This page contains instructions for accessing the HydroShare iRODS datagrid from within a linux terminal using a command line interface (CLI). The instructions shown are using Ubuntu 17.10 however one reasonably proficient in linux may translate adapt these instructions for other linux releases, e.g. Centos.
Step One: Create An iRODS User Account Associated With Your HydroShare User Account
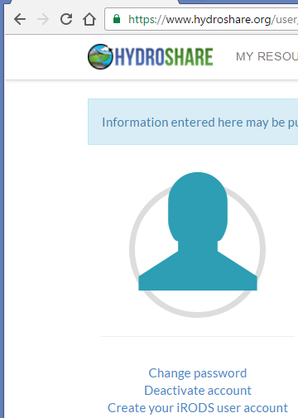
Once you have a HydroShare user account, proceed to your HydroShare user profile and choose the pencil icon in the upper right of the screen to edit your profile. Then choose “Create your iRODS user account” on the left underneath your HydroShare user profile picture to create your corresponding HydroShare iRODS User account. For the instructions herein, you will need to retain your iRODS user name and password.
Step Two: Login to a Linux Shell
For step two, you will need access to a Linux Shell. This can be obtained by contacting the IT group or system adminstrator you work with, or by using a virtualization product such as Oracle VirtualBox to install a virtual instance of Linux on your Mac or Windows PC (how to do this is beyond the scope of these instructions - please contact your IT department or system administrator for help with gaining access to a Linux Shell). The instructions herein show an Ubuntu 17.10 command line interface.
Step Three: Install iRODS Command Line Interface (CLI)
In this step you will install the iRODS Command Line Interface on your linux system. The authors of iRODS highly recommend that you install the same version of iRODS CLI as the datagrid you are connecting to. For the current HydroShare iRODS datagrid, this is iRODS 4.1.8. Please perform the following instructions to install iRODS version 4.1.8 CLI on your linux system (remembering the example shown is for Ubuntu, so you should adjust appropriately for other versions of linux, e.g. Centos):
Execute the following commands:
sudo su -
cd /tmp
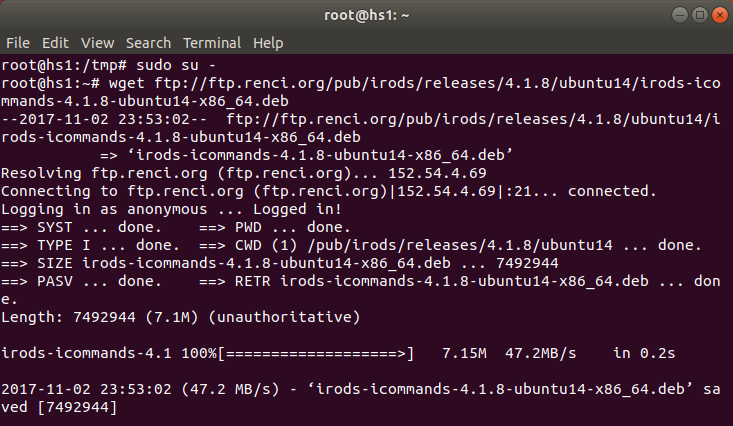
wget ftp://ftp.renci.org/pub/irods/releases/4.1.8/ubuntu14/irods-icommands-4.1.8-ubuntu14-x86_64.deb
Your linux window should display something like this:
Next, type this command to install iRODS on your linux system:
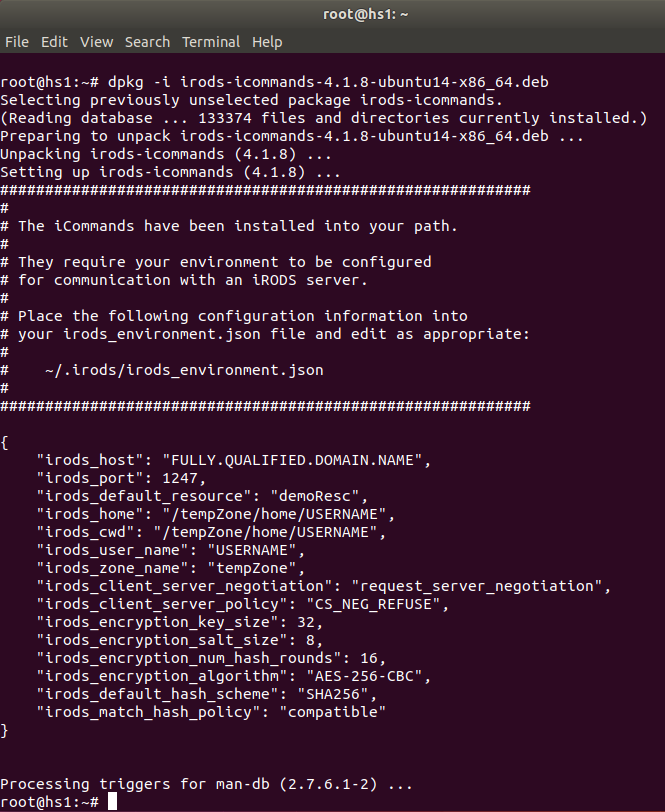
dpkg -i irods-icommands-4.1.8-ubuntu14-x86_64.deb
Your linux window should display something like this:
Type "exit" to get back to your regular linux account that is not sudo or super-user.
exit
Step Four: Configure your linux account to access the HydroShare iRODS hydroshareuserZone
In this step you will configure your linux account to access the HydroShare iRODS zone called hydroshareuserZone.
Make sure you are not still logged in as sudo from Step 3.
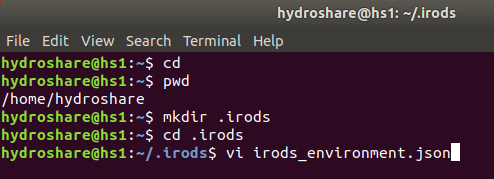
Then, go to your home directory and make a directory called .irods, cd into it, and then edit a file called irods_enviornment.json using your preferred linux editor (the linux editor "vi" is shown here) :
cd
mkdir .irods
cd .irods
vi irods_environment.json
In your editor, enter the following content into the file irods_environment.json:
{
"irods_host": "users.hydroshare.org",
"irods_port": 1247,
"irods_default_resource": "hydroshareuserResc",
"irods_user_name": "put_your_irods_user_name_here",
"irods_zone_name": "hydroshareuserZone",
"irods_client_server_negotiation": "request_server_negotiation",
"irods_client_server_policy": "CS_NEG_REFUSE",
"irods_encryption_key_size": 32,
"irods_encryption_salt_size": 8,
"irods_encryption_num_hash_rounds": 16,
"irods_encryption_algorithm": "AES-256-CBC",
"irods_default_hash_scheme": "SHA256",
"irods_match_hash_policy": "compatible"
}
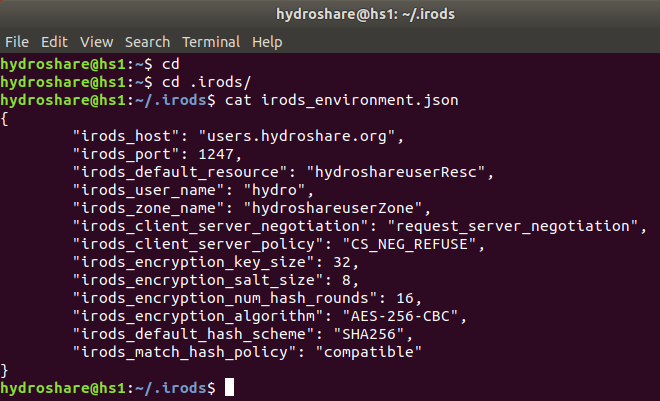
Then save and close the file irods_environment.json. Note that before saving the file, for the line "irods_user_name": "put_your_irods_user_name_here", you should put your iRODS user name in quotes, e.g. "irods_user_name": "jane".
The contents of the file irods_environment.json would look something like this:
Step Five: Start the HydroShare iRODS Command Line Interface for your HydroShare iRODS user account
In this step you start the HydroShare iRODS command line interface for your HydroShare iRODS user account. This is done by entering the following command:
iinit
To test that it worked, try entering the follwing iRODS commands:
icd
ipwd
ils
imkdir test
ils
irm -r test
ils
The output should look something like this:

Congratulations! In the above, you have successfully started the HydroShare Command Line Interface via iinit, changed to your iRODS home directory (icd), display the current working directory (ipwd), listed the current working directory (ils), created an iRODS directory to hold a collection (imkdir), display the current working directory (ils), remove the iRODS directory you just created (irm -r), and display the current working directory (ils).
Important: you only need to execute the iinit command once. iRODS will remember that you have authenticated in iRODS even if you log out of your linux shell and log back it (try it!).
You are now ready to put data into your HydroShare iRODS user area. Try experimenting with the iRODS icommands called iput and iget which puts files into and gets files from iRODS, respectively.
For a complete listing of iRODS icommands, see: https://docs.irods.org/4.1.8/icommands/user/
For further information about iRODS in general, see: https://irods.org